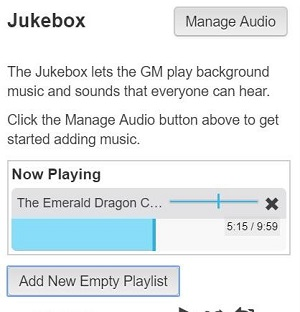
The Roll20 Jukebox allows you to upload your own audio tracks - stored in the "My Audio" section, as well as choose music and sound effects from Tabletop Audio, Incompetech, and BattleBards.
Finding and Adding Audio Tracks to the Jukebox
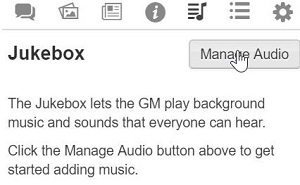
Click on the Manage Audio button to open the Audio Manager
From the Jukebox, click the Manage Audio button to open a popup window to manage your audio.
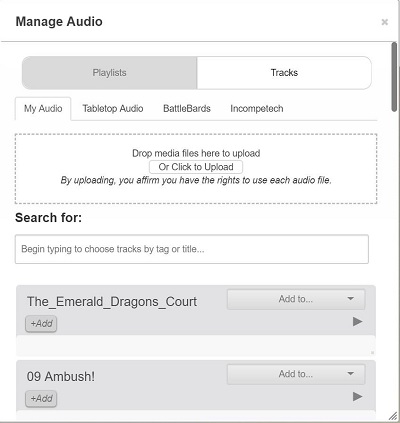
There are tabs for the current four sources of audio we have available through Roll20: My Audio, Tabletop Audio, BattleBards, Incompetech.
Regardless of what audio tab you're searching under, you can always preview individual tracks by pressing the Play button.
My Audio Using Your Own Music/Sounds
Roll20 supports uploading and streaming of your own audio files with the My Audio section in the Jukebox. Audio files uploaded count towards your storage quota. The system allows uploads of up to 20MB. The Roll20 system processes your audio to optimize streaming and storage.
Supported Audio Files
My Audio supports .mp3, .ogg, and .flac file types. Only upload audio files that you have the rights to use. Please keep in mind best practices for audio files when creating or choosing files.
The New Playlist button will allow you to create a folder that can store and play tracks that you upload.
How to Upload Music and Sound Files
From the My Audio tab, drag files to the box marked with dashed line, and "Drop media files here to upload." A square will appear to represent the file as it's being processed. Once complete, the file will show up in the list of files.
Once there, you can click:
- The title of the track to edit the track title and open the track edit tools
- The track title, then trash can icon to delete the track
- The Add To drop down to add the track to a playlist or to the game
- The play icon to preview the track
- The Add button to add tags to the track for easier searching
Tabletop Audio
Tabletop Audio is a site created to provide 10-minute-long background audio tracks for RPG gaming sessions. Roll20 has teamed up with Tabletop Audio to incorporate their library of audio and music into the Roll20 Jukebox.
From the Tabletop Audio tab, use the Search For: drop-down menu to filter the Tabletop Audio tracks available. You can narrow down your search by genre (Fantasy, Sci-Fi, Historical, Modern, Nature, Horror, and Music are the currently available genre options.
Note: TabletopAudio content is licensed under a Creative Commons Attribution-NonCommercial-NoDerivatives 4.0 International License.
TabletopAudio content can be used in podcasts and videos with attribution, if the channel is non-profit. For content producers monetizing their content, TabletopAudio requests you contact him to discuss a licensing arrangement, if your channel is making significant money.
BattleBards
BattleBards is another site partnered with Roll20 to bring you a portfolio of audio and music tracks integrated into Roll20's Jukebox.
From the BattleBards tab, use the Search For: drop-down menu to filter the BattleBards tracks available. You can narrow down your search by track category (Monsterscapes, Music, NPC Scripts, Racial Languages, Sound Effects, and Soundscapes are the currently available category options).
Incompetech
Incompetech is a site created by Kevin MacLeod that houses a prolific library of music tracks that he has composed and made available to the public. All of Incompetech tracks are shared under a Creative Commons license: By Attribution 3.0. The Roll20 Jukebox has a collection of over 1,000 different Incompetech music tracks that spans a large variety of genre types.
From the Incompetech tab, use the Search For: field to search via keywords. At present, keywords only seek out ones that are in the track title. We recommend going to Incompetech's site directly for more enhanced search options that are categorized by Feel, Tempo, Genre, and Length. Once you find the tracks you want, enter their titles in the keyword search of the Track Selection Window to bring them up.
Managing Playlists
You now manage your Playlists in the audio management dialog box, where you can set up playlists that use audio from any source (currently including Battle Bards, Incompetech, Tabletop Audio, and your own uploaded audio files), and Playlists can be copied out of a game and into another game easily.
- Open the Manage Audio dialog box by clicking the Manage Audio button in the Jukebox.
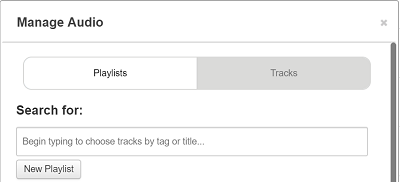
- Click the Playlist tab to navigate to your playlists. The search box returns results for terms that match Track titles, Track tags, Playlist titles, or Playlists that contain Track matching tags.
- Click New Playlist to create a new playlist for your tracks.
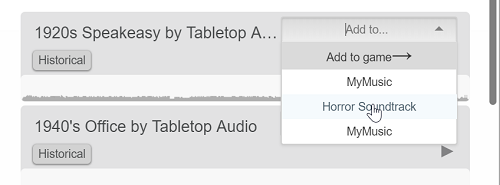
- Click to the Tracks tab to add tracks from your uploaded audio, Tabletop Audio, Battlebards, or Incompetech. Find the track and click Add to... to select either the current game, or the playlist by name.
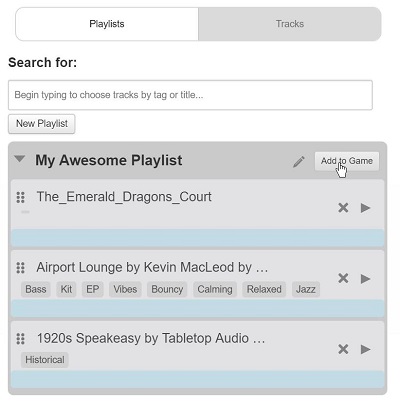
Add the playlist to your game by returning to the Playlist tab and clicking Add to Game:
Note that, because the playlist is in your audio library, when you go into a different game where you are the GM, you can copy the playlist to the new game.
You can also rename the playlist by clicking the pencil icon, or delete tracks from the playlist by clicking the X icon. To delete a playlist, click the pencil icon and then select the trash can.
This feature creates a new copy of the Playlist in the game. In this way, you can change a playlist for any one dramatic role playing scene or amazing action battle sequence without affecting any other game. If you delete a track from a playlist, it will not be deleted from the playlist in your Playlist tool, nor any games that the playlist is already in. However, if you like the changes, you can export the Playlist out of the game and into the Manage Audio tool for safe keeping. To export a playlist, click the Export button on the far right of the playlist in the Jukebox.
Adding Tracks to Your Game
Add your desired music/sound tracks to your campaign's Jukebox library by clicking the Add To menu in the track listing (this is directly to the right of the track title). Selecting "To Game" adds the new track to the bottom of your track list in the Jukebox. Selecting any playlist in your playlists will add the track to the bottom of that playlist.
Organizing Your Jukebox Audio Tracks
Once you begin adding audio to your Jukebox, you're likely to create a very robust library of audio tracks before too long. There are several methods Roll20 gives you to keep all of your tracks organized.
Renaming Tracks
You can rename a track once it has been added to the Jukebox tab of the Sidebar. To rename it, hover over its entry in the Jukebox until it highlights in yellow. A type cursor will also appear. Click anywhere over the title to make it editable. Type a new name for the track and press Enter to save the change.
Rearranging Tracks
Removing Tracks from the Jukebox
Fanburst and Soundcloud tracks that were added prior to those systems becoming unavailable are grayed out in the Jukebox. If you have unsupported tracks like this, you can click the "Remove all unsupported tracks" button to remove all those tracks from your game.
Creating Playlists
You can create folders within Jukebox's track list called Playlists. Beyond simply keeping batches of related tracks together for organization purposes, a Playlist can be played directly. This allows you to cycle play through various tracks without manually having to stop and start playback manually.
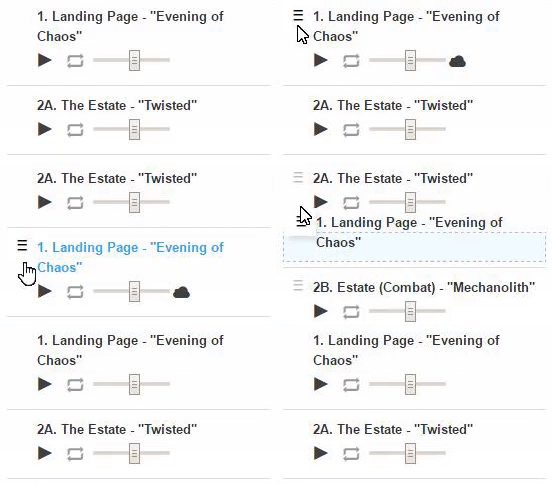
To add a Track to a Playlist folder, click and drag the Track's handle icon to move items into the folder. You can pull Tracks out or swap Tracks between Playlists in the exact same fashion.
One thing to note about The Jukebox Playlist system is that it is only 1 level deep, sub-folders are not available in the Jukebox.
Adding Playlists
Click the + Add button, and then click Playlist. A popup window will appear to prompt you to give the folder a Name. Click Ok to add the named folder to your Jukebox.
Playlists Options
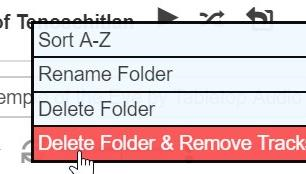
Right-click on a Playlist to reveal these folder options: Sort A-Z, Rename Folder, and Delete Folder.
- Sort Playlist Tracks: Choose Sort A-Z to organize the Tracks within your Playlist in alphanumerical order.
- Rename Playlist: Choose Rename Folder to rename that Playlist. This will bring up the name popup window that you saw before when you first created the Playlist.
- Delete Playlist: Choose Delete Folder when you want to remove the Playlist entirely. Deleting a Playlist does not remove its Track contents. All Tracks that were within the folder are moved to the root Playlist (The default Jukebox track list.
- Delete Playlist & Remove Tracks: Choose Delete Folder & Remove Tracks when you want to remove the playlist and all the tracks it contains entirely.
Popping-Out the Jukebox into a New Browser Window
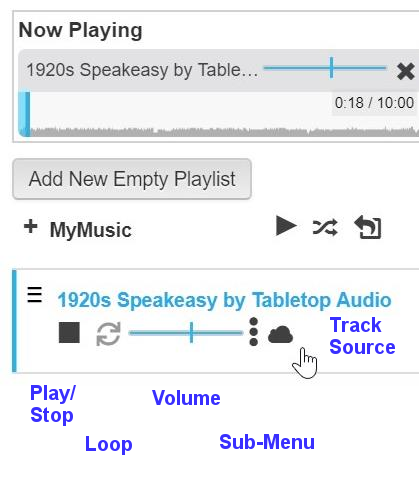
Play/Stop Button
Loop Button
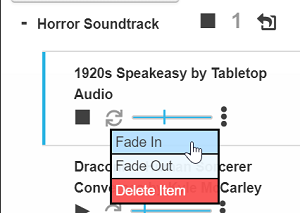
The next icon beside the Play/Stop button is the Loop Track button. When Loop Track is turned on, once a Track reaches the end of its playback, it will automatically start playing itself from the beginning. In other words, it will never stop playing until you either toggle off Loop or click on the Stop button of the Track. This feature is recommended for background noise and music, but not for circumstantial sound effects like an explosion or sword slashing audio Track. By default, Loop is toggled off, which shows the icon in grey. Once activated by clicking on the button, the icon turns black. Enabling or disabling Loop on a Track is just a single left click.
Volume Slider
To the right of the Loop Track button is the Volume Slider. Each Track has its own volume control which can be used to normalize their volume. When the slider handle is moved to the far left of the slider, the volume level is at 0% and 100% when moved to the far right.
Track Source URL Button
While this feature does not affect playback, it is worth mentioning if you ever want to retrace where an audio Track comes from. When you hover your mouse over a Track, a cloud icon will appear directly right of the Volume Slider. Clicking this icon will open the Track's source in a new window.
Play from Playlists
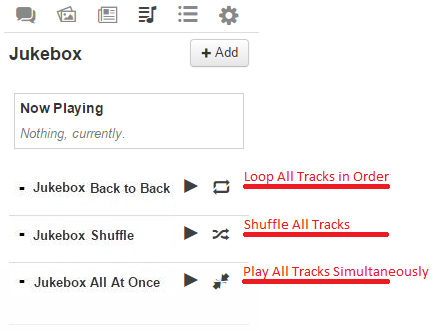
Playlists have additional play options. Next to the name of the playlist you'll find a "Play" button as well as a toggle for the "Play Mode" of the playlist.
In Manage Audio, you can set different playlists to different playback modes that will be used when you start that playlist.
Note that you cannot change the playback mode for a playlist while it is playing; either stop the playlist, or wait for it to finish.
Back to Back
Shuffle
All at Once
Now Playing Widget
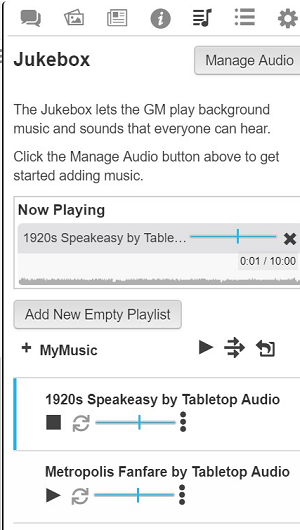
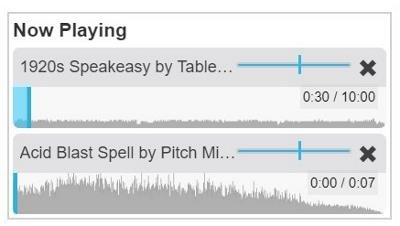
At the top of the Jukebox is a Now Playing widget. This tool is visible to players in game and will only display Tracks that are currently playing. This is the only 'hint' to the players of what is being played when they tab over to the Jukebox. They don't have access to see the Game Master's entire Jukebox Track list. Pressing "Play" on any given Track of Playlist will add those Tracks to the widget and GMs can stop their playback directly from this widget.
Play on Load
Master Volume Control
